A Carboniferous Beast – 2005 Trek Madone 5.2 :

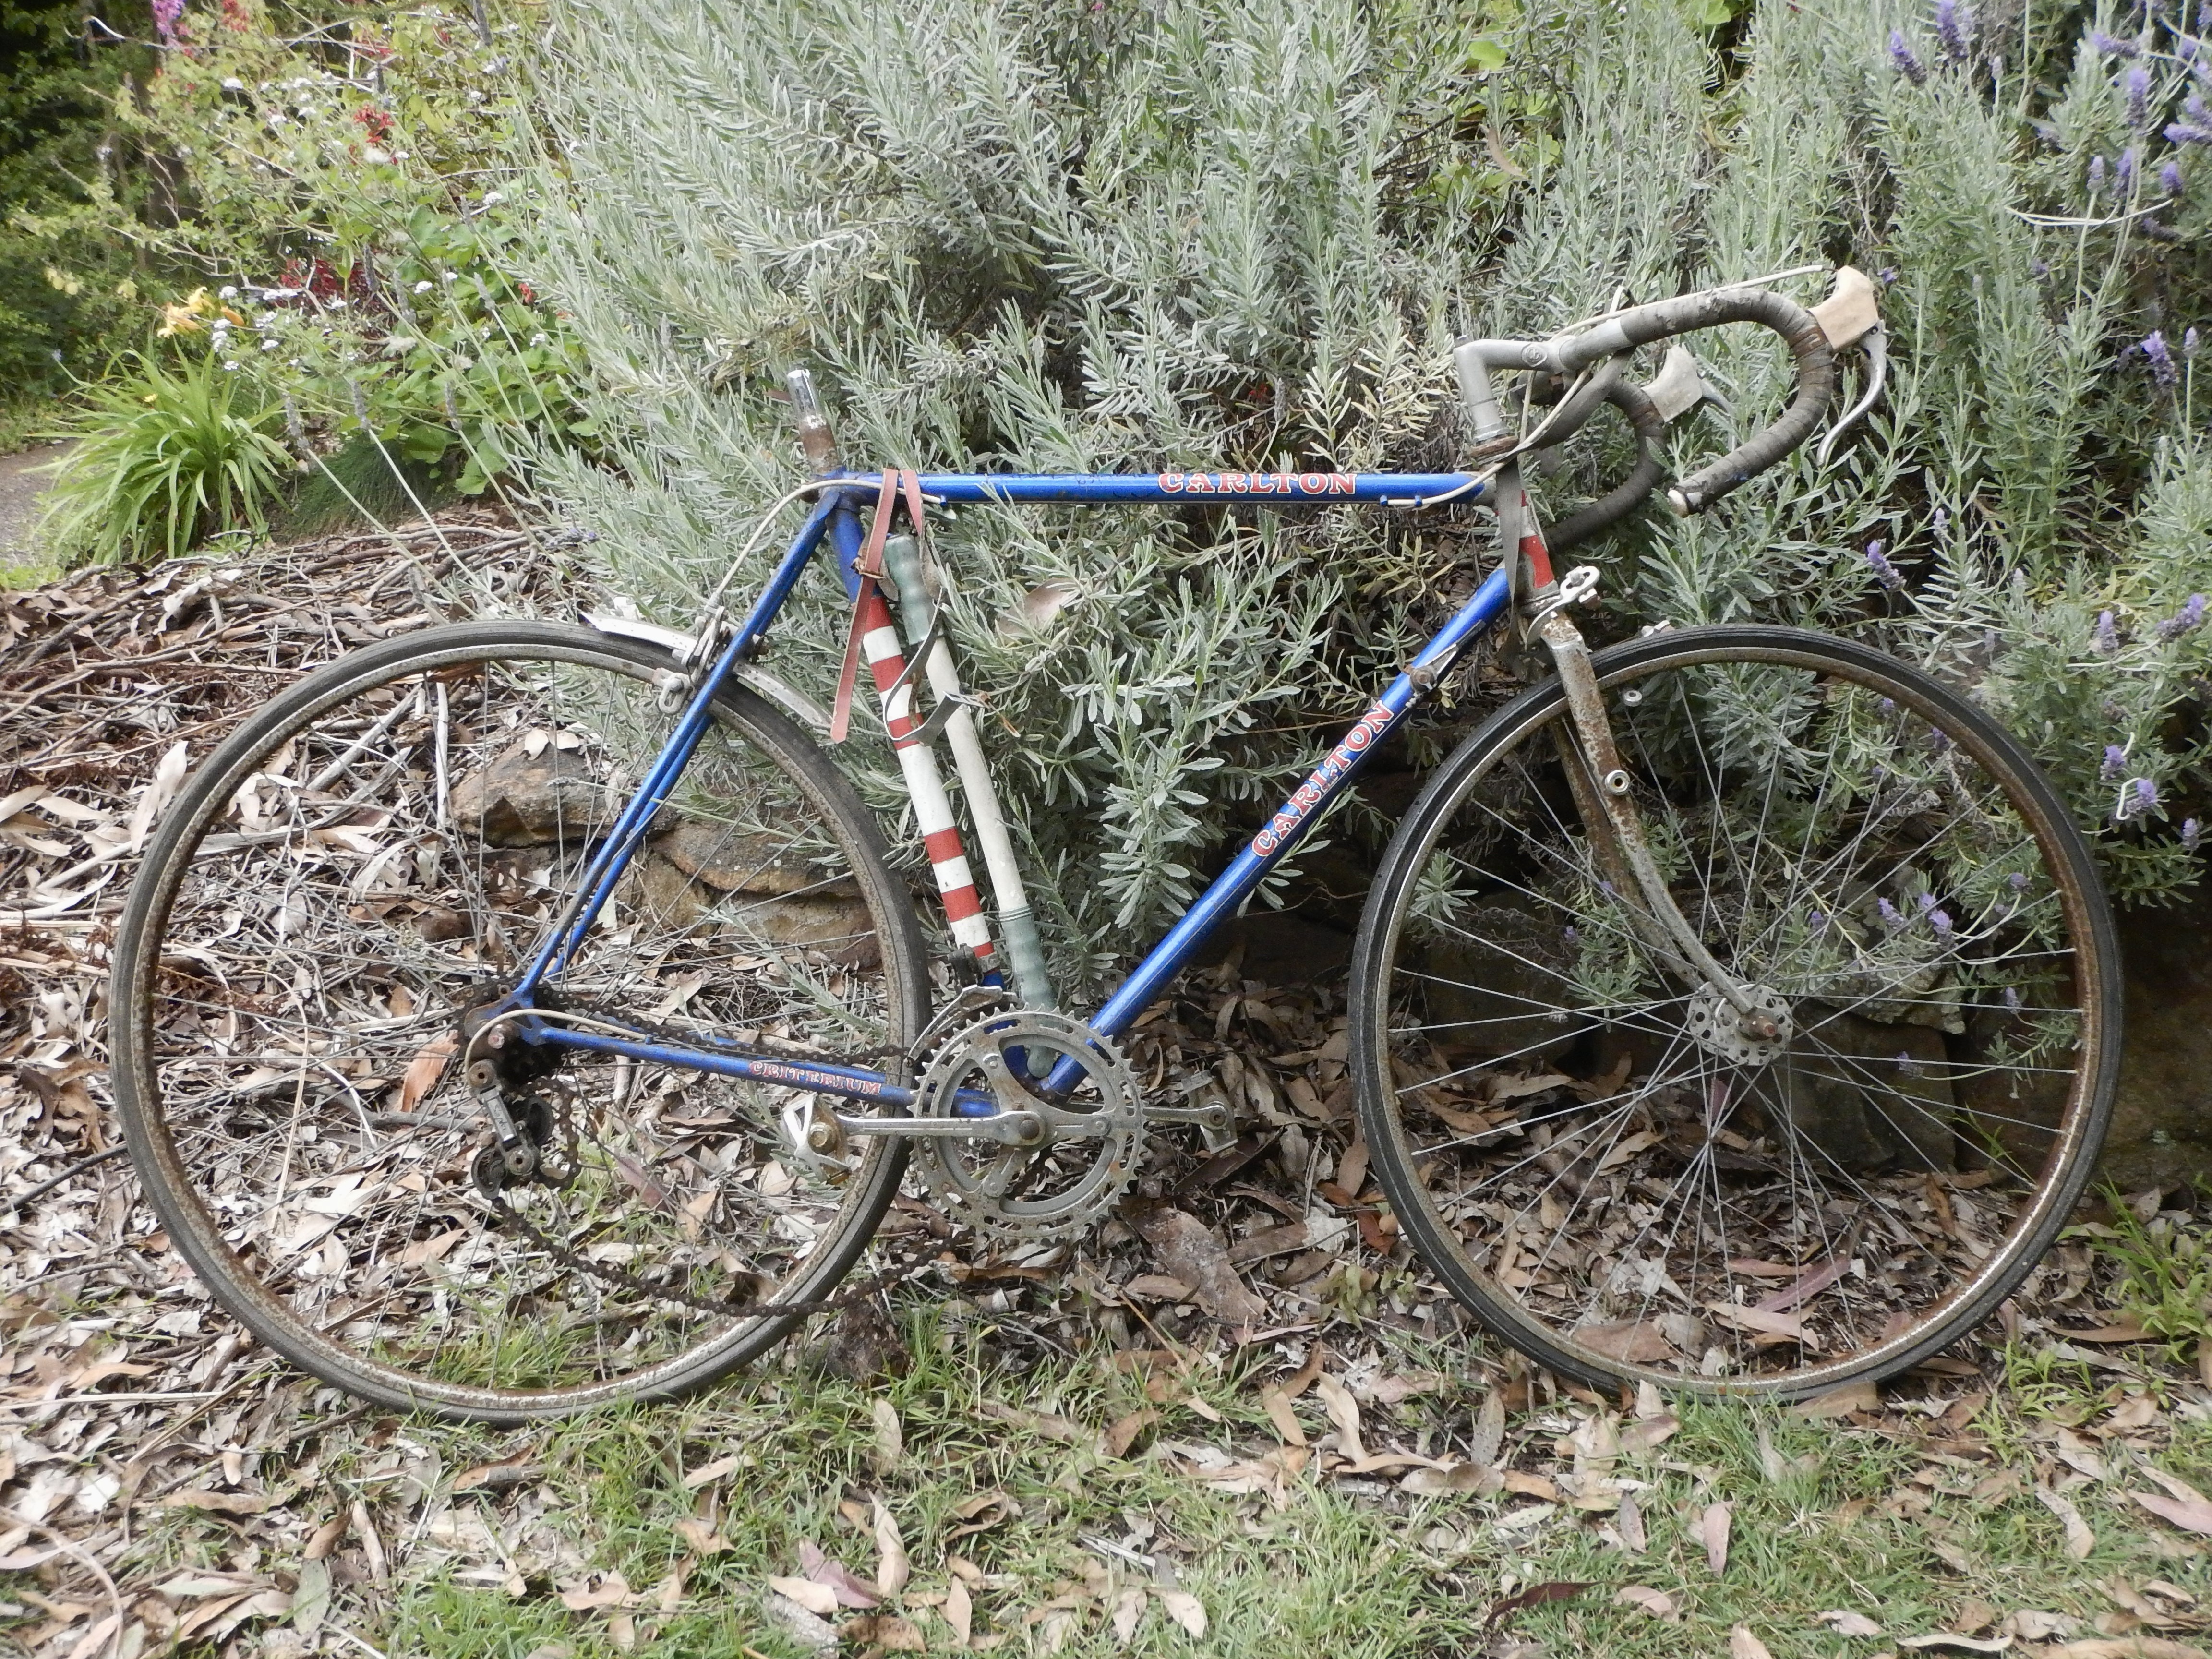
Flat-out race bikes aren’t exactly my cup of tea, but I seem to end up with the occasional older one, and I wondered what I would make of it. ( it’s N + 1, but the price was too good to pass up ).

  • The rustic look, finished bike..

The Trek Madone was ( is ) their sporty carbon race model, though this one is early, and probably well ‘superseded’ by now .. you know, lighter, faster, stiffer, more speeds, bacon slicer disc brakes, and all of that Jazz.

I think it’s around a 2005 build, and apart from the usual consumables, ( pads, cables, rings, chain, tyres, tape, etc., phew, they all add up ), the only problems I could see were the perished hoods on the Ultegra 6600 levers and the horribly corroded alloy spoke nipples, looking like broken teeth, on the Bontrager bladed spoked “Race-lite” wheels. 

Alloy nipples and salt air..  

Those machine-made paired-spoke wheels were light, but too specialised in their construction to be worth my while repairing. I only really managed to save a skewer !  Spoke tension was high, and the spoke key destroyed most of the rotted nipples with the remainder still welded to the spoke threads… 

Which also brings me to some speculation about carbon frames. While steel and even aluminium can be melted and re-used, or crumble slowly into dust, what happens to a carbon frame over time ? Will it stay in landfill for 1000 years, or is there another use for it ? Road base ?? Hmm.

I don’t know, I don’t buy new bikes now, but surely the best use for decent bike frames is to look after them and keep using them as actual bikes for as long as possible. 

  • This here’s no country for old Madones ..

I guess the biggest obstacles to long carbon frame life would be impact damage, long term ultraviolet damage to resin, or fatigue or corrosion of the metal parts such as the drop-outs that are bonded to the frame. The rear derailleur ‘hanger plus drop-out’ is one piece so I assume that a bent hanger would write off the frame ( but I don’t know that for sure ! ).

The bike has an attractive looking Shimano 6600 10 speed group set ( really though, I’m happy with only 7-8 rear speeds, and those 8-speed chains do last longer ).  Tyre clearance is restricted to 25c max., typical of the era. 

Despite the plain ‘stealthy grey’ colour, I find its naked carbon weave appealing, although that too seems to have been a 2000s ‘thing’, and out of fashion nowadays.

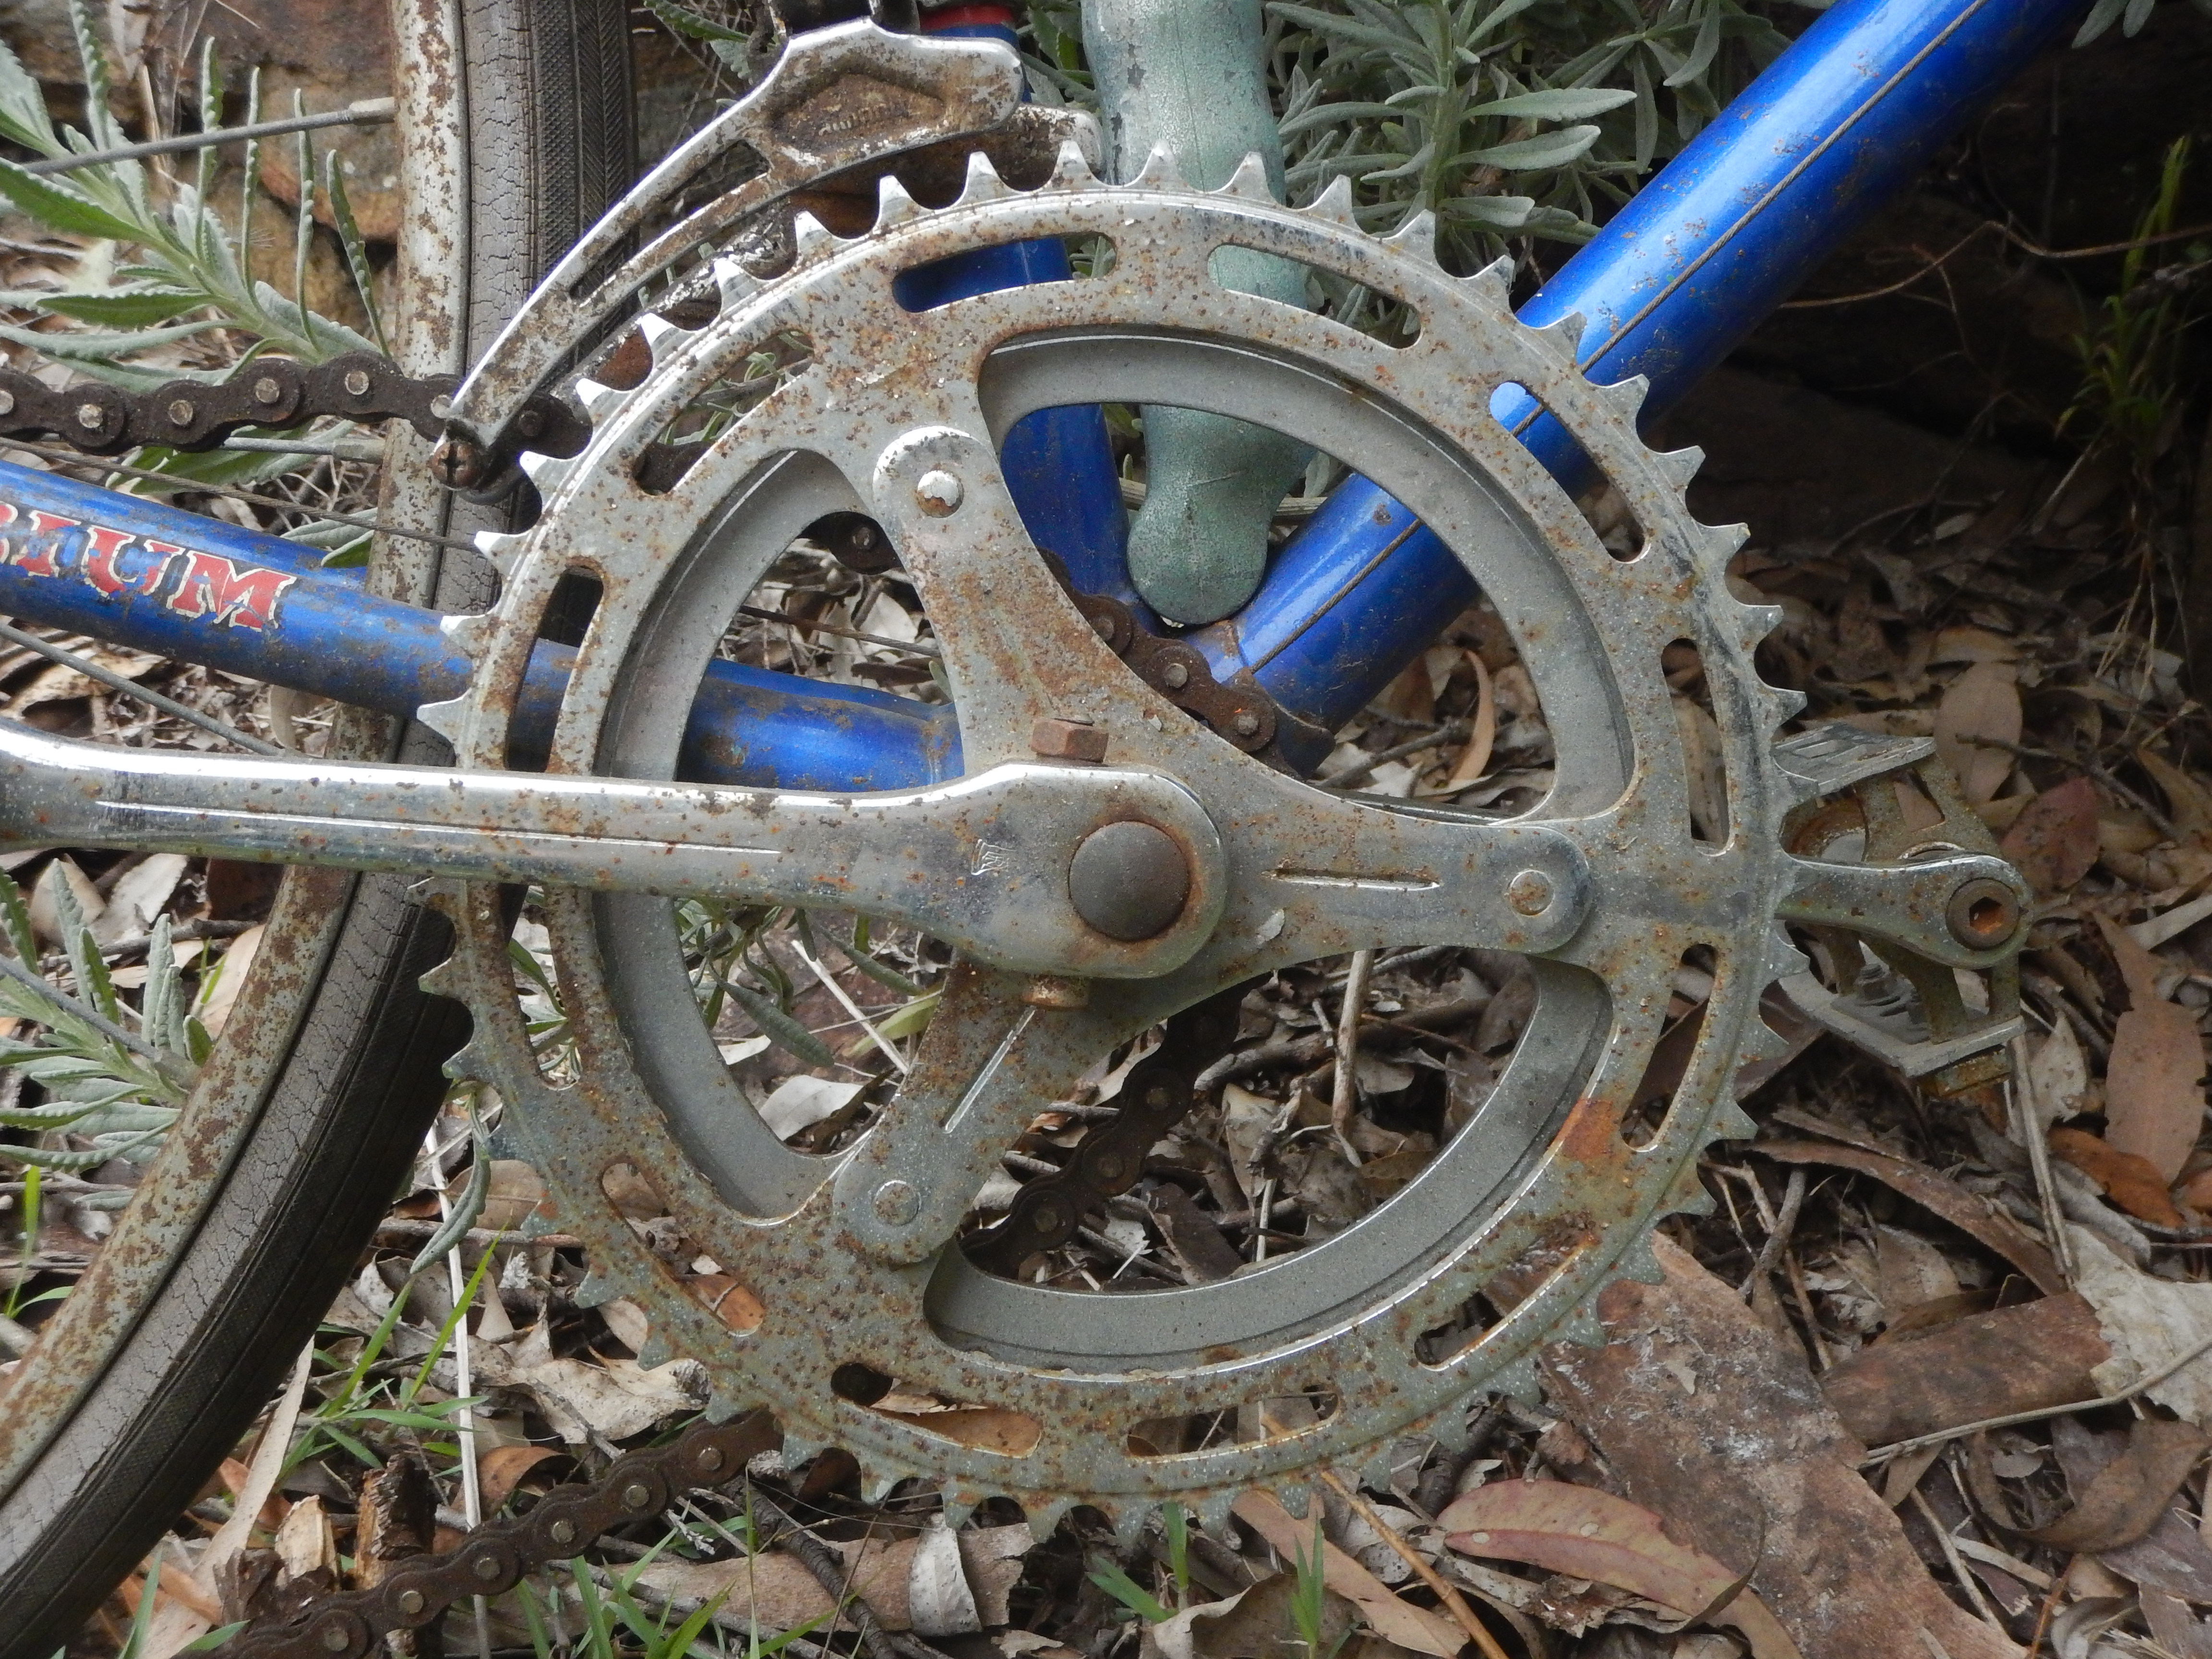
At least the chain set pre-dates the ‘own brand’ moulded chain rings of the newer Shimano stuff, and the Hollowtech II set-up was easy enough to disassemble to remove the old chain rings.

I’ve replaced the somewhat hooked chain rings, and the old chain was stretched to well over a millimetre on my chain checker !  Luckily I had some lightly used 10 speed bits I could fit along with the new chain. The bottom bracket bearings run very smoothly, so I left them alone.

  • Ha – you would hardly know it was a heretical riser stem ! The bag will also carry a small powerbank for my ageing Garmin 520.

As the Madone cockpit was designed with a low front end for a racing crouch ( and I don’t ride that low ), I fitted a Ritchey adjustable riser stem which doesn’t look too heretical ( to my eyes at least ). There’s no indication of frame size, but the top tube is around 56cm. Seat tube measurements are ambiguous ( virtual ? ) on this kind of bike.

The only 6600 hoods I could find at a decent price were purple ‘Hudz’ brand, if you were wondering .. they’re growing on me. 

Well, it’s a bit heavier now than it was, what with 36 spoke H Plus Son rims, but as it’s still much lighter than most of my bikes, then why should I worry ?

Is it a classic yet ?  I don’t know, but it rides quite nicely, even with 25mm tyres. 

Happy Re-Cycling !

A 1970 Malvern Star Roadster – Continued :

I always expect surprises when overhauling an old bike – in this case it was the steering bearings.

  • – as acquired, 3-speed, drop bars.

The bottom race had the same loose 3/16” balls as the top one, but the crown race and bottom cup were different, having been designed for caged bearings ( i.e. no ball track ), resulting in the loose balls wandering everywhere and gouging the internals where they shouldn’t. 

They were replaced with caged bearings in a new bottom cup and crown race ..

This was a good example of why a full strip down is worthwhile on a new acquisition of this vintage, before more damage is done.

The BB spindle was in good condition, but a service is always advisable there too, and despite pressing them out, the pressure still bent both cotter pin’s threaded ends.

  • – New look, after overhaul, cleaner, simpler, lighter.

I decided to convert the bike back to a single speed, still with chrome rims, to keep it closer to what I think was original, and cleaner looking, using a re-cycled Suntour coaster brake ( plus a front hand brake for safety ). 

Coaster plus hand brake combinations are great for roadsters, as the coaster gives stability when slowing or stopping from low speed, the hand brake being used as well at moderate to higher speeds.

  • – The replacement ( re-used ) quilted saddle, sprung, but in keeping with the more upright ride.

The handlebars were changed to a more practical riser style, which were also typical of the era.

I personally find normally positioned drop bars too low on this kind of bike, but when turned up they are too high for me.  Generally these older roadsters have a shorter seat tube and longer top tube  and that seems to suit either north road or riser style bars better.

The original quilted plastic saddle had a tear in it, but I had a very similar sprung version that suited just as well.

  • – Note the adjustment screw on the caliper.

I matched up the wheel rims and fitted a slightly less ancient front brake for safety, this one is a Dia-compe and has an unusual compensating spring arrangement that can be adjusted to help locate the brake pads equidistant from the rim.

All in all, it’s a simple classic ‘around town’ reliable roadster, that to me just looks ‘right’.

Happy Re-Cycling !

The Speedwell Diaries – c.1956 Special Sports :

  • – A bit dusty & rusty, but nice anyway..

The Williams Cranks are dated AW = 1956, and the Sturmey-Archer AB hub is from1957. Serial No. is V279xx. 

It’s an unusual hub for a Special Sports as it has a drum brake as well as the usual 3-speeds.

  • – The rear spokes are 4-cross, and the resulting extreme angles seem to encourage spoke loosening over time on the large brake flange side. The cable is quite simple to disconnect.
  • – A.B. hub : the first one of these I’ve seen close up !

The drum brake’s lever and cabling are from Sturmey-Archer, and the rear brake lever is different from the typical Speedwell front ‘Monitor’ style while the front calliper is a Monitor Ventura. 

Otherwise, the bike has the typical mid-‘50s sloping down-tube graphics but not the chromed and painted forks. It’s another example where a fancier lugged fork crown has been used on a “Sports”. 

A Dunlop rubber saddle was fitted, rather than the usual Bell leather, and other than those items it’s a fairly standard ( but nice ) Sports in the green-over-gold colour, in very decent ( but dusty ) condition. 

  • – Nowadays this would be called a “Cambium” !

I’m in the process of giving it an overhaul for the owner, which entails a strip-down, clean, re-grease, re-fit, adjust, de-rust and shine, while maintaining some of the patina …. whew ! 

Frame Bearings :

To remove the cranks on these, I use a 100mm vice as a press, with a socket spanner head over the pin head, apply penetrant and loosen the nut off a bit before tightening the vice. Even so, I bent the old pins with the pressure.

The old bottom brackets are problematic as the fixed cups can bond with corrosion to the shells and they only have holes for a pin spanner – no flats – and minimal purchase = no chance. 

After possibly 50-60 years of neglect, like this one, they may not budge, but it’s not necessary to remove the fixed cup for a basic service, and as long as the cup is not pitted, it can just be thoroughly cleaned in the frame. 

Usually ( but not always ), the adjustable cup is not so cantankerous and can often be removed with just a hooked c-spanner for the lock nut plus a pin spanner e.g. Park Tool SPA-1 for the cup. You can sometimes get away with using a hammer and punch, but run the risk of scratching or rounding off fittings, so it’s not recommended. 

  • – With luck, above are all the tools you’ll need once the cranks are off. I’ve dealt with stuck ones elsewhere, so let’s be positive !

The spindle in this bike was in great condition, but they are often badly pitted. If re-tapping the BB threads isn’t necessary, I will still give them a run over with a wire tube brush on a cordless drill to clean them out a bit more. You’ll save yourself ( or someone else ! ) a lot of later trouble by greasing or anti-seizing all the threads when refitting the cups. They should hand tighten most of the way if properly clean.

  • – Note the non-rounded profile of the lower crown half-race.

As long as the head stem isn’t stuck in the steerer you can generally overhaul the head set fairly easily using large multi-grips or locking grips on the chromed top race. A large shifter works for for hex. or oct. sided top nuts and a pin spanner for the round ones.  If using grips I put a cloth around the race to avoid scratching the chrome. If the races aren’t worn it’s just a matter of cleaning and/or replacing the many 1/8” loose balls. On this bike I used new ball bearings. 

  • – Useful tools and spares for the headset..

When re-fitting the typical older loose ball head sets it’s best to keep the balls between their two half-races at all times. If you try to screw the adjustable chromed top race separately onto its ball-filled matching lower ( sitting in the top steerer cup ), it’s too easy to lose the balls with the rotational drag of the grease.

  • – If you keep the half races together with balls and grease ( as on the pin spanner above ), the balls are less likely to escape. Various permutations of typical ’50s and ’60s Brampton headset pieces are shown above. Fifties Speedwells ( but not this one ) may have the cups integrated into the head tube – non removable, but they still use the little half-race rings. The fork crown race’s bottom half has a different profile to the other small half-race rings ( above pic, centre bottom ).

Fill the greased lower crown race with balls, leaving one ball space, then lower its top half-race onto the steerer crown race. Fit the fork steerer ( with races and bearings ) up into the frame, then turn the frame and fork upside down, preferably held in a stand, while holding the fork firmly in place in the frame. Carefully screw the combined upper half-races and bearings together onto and up the steerer while it’s still upside down, until the bearings are safely held in place.

I’ll show some more details and the overhauled bike in an upcoming post..

See Ya !    

Australian Classics – A 1994 Protour Nova Lite RX : 

These 1980s-90s South Australian built bikes sometimes appear, mostly in the sturdy, but heavy, Tange 5 plain gauge Chromoly tubing. I’ll post some details here as a reference, as typically there isn’t a lot of info around on this brand.

  • – the ‘nova lite rx’ decal is missing from the drive side of the top tube

This one is in the better medium weight  Tange ‘Infinity’ butted Chromoly tubing, but only has relatively basic Shimano Exage 300 components.

  • – only the pedals ( pda550 ) here are from the RX100 group.

Some research suggests that the Nova Lite was the top model in Southcott’s range, and perhaps this one was specified with the lower group just to cut some cost. Unfortunately a name like Protour when ‘googled’ also turns up all sorts of irrelevancies, and that can make researching frustrating.. 

After some thought about the group set, I’m wondering if the ‘RX’ in the name referred to Shimano RX100 components, as this would be more appropriate, given the frame material, and would fit the period and the “Shimano” chain stay protector.

This frame has a 55cm seat tube and 56cm top ( C-C ). 

I have heard of this model being fitted with an Exage 500 group set, and it would be worth upgrading to the higher 105, or RX100 ( or equivalent other brand’s level ) , for such a decent frame.

  • – there are black spray paint stripes down the frame tubes centres.

The bars are Sakae Modolo anatomic and appeared to still have their original bar tape, however, hidden underneath that tape, and under the brake hoods, was a heap of rust patches. Well, surprise, surprise, the Sakae bars are similar to those Hsin Lung brand ones that have a sneaky alloy centre sleeve, hiding a heavy steel bar … sigh. 

At least the stem is alloy ( Kalloy ), as is the 26.4mm seat post. Confusing, as my other Infinity framed bike, a 1990 Shogun Samurai, has a 27.0mm post.

Brakes are Exage Motion and the saddle is a Viscount. The serial number, saddle stamp and components suggest a 1994 build. Gearing is 52/40 biopace with a Suntour ‘AP’ 13-24T 7-speed freewheel.

  • – definite possibilities here ..

Wheels have decent Sansin hubs and Ambrosio rims, but they will need an overhaul, and likely, new cones and bearings.

The AP freewheel is supposed to go with Suntour Accushift systems, so it’s a mystery as to whether it will work with Shimano indexing ?? Perhaps I should have tried it before dismantling – hmm !

This bike came from a tip shop that ( strangely and annoyingly ) disrespects bicycles by leaving them out in the weather with no rain cover, so corrosion sets in very quickly so close to the sea … anything decent found there needs a quick rescue, before it’s too late.

Happy Re-Cycling !

A Little Work of Art – 1959 32H Fratelli Brivio Large Flange Track Hub :

I don’t usually post about a single hub, but I’ll make an exception for this little orphan. 

  • – a bit special, this !

It came laced to an alloy 27” Weinmann rim with lightweight butted spokes, however the rim is too ‘hoppy’ to be useable, so it has had some use. 

On a first ‘spin of the axle test’ the hub felt a bit scratchy, but when the cones were backed off a tiny bit, the buttery smoothness was like that of a good Campagnolo hub, and there was no detectable ‘play’.

Intrigued, I dis-assembled it, and it was quite impressive.

  • – lovely !

The 5/16” axle, cones, steel hub shell and alloy flanges are all proudly stamped “F.B.” and the cone outers are stamped ’59’ . Bearings seem a little bit smaller (?) than the usual 3/16”, and there are 10 to each side. It’s just over 100mm across the locknuts.

There are no removable seals and the machining is so fine there is hardly a gap between the cone and the shell, also the locknuts and washers fit perfectly face to face, and there are even tiny holes to inject grease right into the races as required.

  • – how thoughtful, a grease port !

The chromed steel shell is finely joined to the aluminium flanges and it is as slender as it could possibly be.

There is some information about this Italian company ( 1931- late 1960s ), and with a tie in to Campagnolo, it’s worth googling to check it out further if you’re keen on bicycle history !

I cleaned, greased and re-assembled it, but now I think I’ll sit it somewhere where I can admire its mechanical elegance.

Happy Re-Cycling !  

A 1974 Raleigh / Carlton Criterium – Part 3 :

Meanwhile, the frame and fork have also progressed, by neutralising rust then a rough-ish paint touch-up..

  • – sure, it’s a fair way from original, but it’s still alive at least .. and arguably better riding.

The lovely sloping crown fork had surface rust that had taken out many small patches of chrome, and if the next owner is so inclined,  they can pay to strip and re-chrome the fork. I’m happy just to roughly restore a little overall shine.

  • – a sun tour sprint track hub … noice !

I cleaned up the steering races and fitted new 5/32” loose bearings, along with a similar ( but better looking ) top cap.

I decided to use a different set of wheels, at least until I find some suitable alloy rims for the Sturmey-Archer hubs. 

These wheels were already built and ready, but the front axle won’t take the 5/16” Carlton wheel nuts. They have new 36H x 27” Alex AP18 rims, the front has a Suntour sprint track hub and the rear has an ( almost matching ) re-conditioned French Exceltoo high flange. 

The front hub’s 3/8” axle doesn’t need the flanged lock nuts. This Suntour hub is better quality and sturdier than the OEM Sturmey-Archer. 

  • – bear in mind that this may not be the final wheel set .

Tyres are new Schwalbe 27” marathons.

I didn’t use the Weinmann 730 brakes either, as I only had one complete unit at the time, instead I’ve chosen some nutted modern Tektro dual pivots from my spares box that had the reach when I lined them up against the wheel rims. Let’s face it, the 730s are only OK stoppers anyway.

It still might not appease the purists, but I will keep the remaining unused original parts together just in case. 

  • – gotta love some plastique shifters !

The drop bars that came with the bike are only 36cm wide, so I changed them for wider moustache style bars, with reversed TT levers. I think that reversed levers are best on moustache bars, to me they feel the most natural, though they look a little strange, like the ‘suicide doors’ on some old cars ! 

Fitting road brake levers horizontally may also have worked on these bars, but didn’t appeal to me here.

I generally fit the bottom fairly bracket early on, but not the chain set – at least until the wheels are on. Then I line up the derailleurs and brake calipers ready for cabling. Last of all come the cables, chain, saddle and bar tape.

  • -don’t panic, it’s a very tall stem, and quite safe.

The GB stem replacement came from my spares drawer … I knew I had it there for a reason ! It’s a little bit shorter than the original, but that should suit the new bars.

The current saddle is a Selle Italia ‘Mitica’, the model was released a few years ago, not sure if it’s still available.

  • – I’ve had this saddle a few years, waiting !

Although I now consider it finished, it’s sure to have some more swaps and changes as time goes on..

Happy Re-Cycling ! 

A 1974 Raleigh / Carlton Criterium – Part 2 :

1974 Raleigh / Carlton Criterium – Continued :

  • – as donated, from a couple of posts ago..

Almost always, on a bike this old and neglected, the cones will be worn and the hub will be dry, but surprisingly, the grease inside was still wet. Cones don’t seem to last long on skinny 5/16” axle hubs, and these were no exception, though they were less pitted than usual.

  • – the rear hub, showing fixed seals

So, new cones and bearings front and rear, which could have been a problem, because the dust seals are large, and not similar to any new cones I could find. I had to do some hit-and-miss-searching, and even though I tend to keep any undamaged hub seals from worn out hubs, I got lucky.

The 27” steel rims were crying out to be replaced with aluminium ones, and them being so rusty gives me the excuse I need !  36 hole rims will be easier to source in aluminium than a Speedwell’s  32 & 40H ones would be.

The front hubs have cones, spacers, washers and flanged lock nuts to fit the wider fork ends, and by adding or removing spacers ( or different width lock nuts ), one can substitute a new, wider, non-standard cone and keep a similar overall lock nut width.

  • done – new and old cone seals shown.

Luckily the sealing rings around the front replacement cones are the right size for the hub too. I removed the thicker spacers which gave me a 94mm O.L.D. front with the new cones.

As to the gearing, while I could easily accept the 49 x 14T high gear, I can’t accept the 40 x 24T low gear for my own use, as I do have hills to deal with. 

I had a Sun Tour Perfect freewheel 14-28T in 5-speed and excellent condition, so that part of the problem was solved.

  • -I will use all these, excepting the R.D.

For the chainset, I will use a 34/46T compact 110 B.C.D. set-up. 46T is what you would generally get on a bike like this if it only has one chain ring, and the 34T inner would give a much improved climbing ‘dual range’ below that. Otherwise I would have fitted a triple.

For the derailleurs, I wanted to use what I had in spares, so I will use this trusty Suntour Honor , which is roughly of the period. It may be all steel and heavy, but it shifts smoothly and reliably in friction mode, and will handle at least a 30T rear cog and 28T teeth overall, which was pretty decent at the time ( this one is c.1976). 

  • – say one thing, say it’s solid !

Suntour were miles ahead of everyone else for 20 years, with their patented slant parallelogram derailleurs, so even the fairly basic Honor performs well in friction mode. I would disregard any “expert”  that says otherwise. The other major manufacturers only ever caught up when SunTour’s patent expired in 1984.

As an aside, I recommend reading Frank Berto’s book “The Dancing Chain” which is a marvellous and comprehensive history of derailleur gearing up to the early 2000s. 

  • – well, I could clean it up, but … nah !

The OEM simplex rear derailleur was heavily rusted and has a broken tension wheel, though it is probably still repairable. I ditched the el-cheapo Shimano Tourney front derailleur that was on the bike.  

  • – I couldn’t get this nice Sachs-Huret New Success to work for me, but I used the shifters.

The new F.D. is a recycled SunTour, and the shifters are Sachs-Huret left over from my Raleigh Granada build. Having second thoughts since then, these have a nice micro-ratchet movement, and despite the plastic levers, they are good to use. A quick run over with a mini-tool steel brushing wheel removed the grey surface coating of ‘dead’ plastic, and polished up the metal parts a little.

Final part 3 to follow ….

A 1970 Malvern Star “Gold Anniversary” Roadster :

This one posed a couple of questions – it’s a three speed with a period 1969 dated AW hub, but the brakes aren’t original, the front being an older Phillips that clamps to the forks, and the rear is a generic older steel calliper with home made pad stops.

These roadsters ( a.k.a. roadstars ) mostly came with single speed coasters so the 3 speed rear wheel was maybe added shortly after the bike was purchased.The front rim is a different type, and is possibly an original wheel.

– this Phillips style brake is definitely older than the bike !

It’s in good nick for age with little wear showing, and with the same colours as the loop frame Speedwell that featured a couple of posts ago. That one was also Malvern Star made ( after they purchased Speedwell ) and the two bikes have many similarities, including the location and style of the serial number.

I might keep it as a 3-speed, but may temporarily fit a newer coaster wheel set ( while I’m sorting out the wheels and brakes ), to see how it rides. The bike needs a service, a tidy up and some minor swaps and replacements, such as the tyres, steering top cap, brakes and levers, a new indicator rod for the hub and a seat tube pinch bolt. Alternatively, a light weight 80s coaster and alloy rims would remove a lot of weight from what is a fairly heavy bike, but if so, it would still be best to keep a front brake for use in modern traffic.

– the home made pad stops are not a bad idea, given the flimsy callipers, but their alignment is way out..

I enjoy these basic roadsters, as they are sturdy, simple and unpretentious, designed as reliable get-about bikes, the Speedwell Popular being another favourite of mine. Now though, their age, patina and traditional looks make them stand out from the crowd.

-these old centre pull callipers are only fixed at the fork legs ( and need alignment ).

The sticker at the top of the down tube reads “Malvern Star Gold Anniversary”, which refers, I think, to 50 years of the brand since the Bruce Small purchase in 1920, although he had already sold it on in 1958 and it would be sold again in 1970, 1980,1992 and 2011. In fact the company really started in 1902 !

To be continued :

A 1974 Carlton Criterium :

In which the Re-Cyclist posts updates on the work undertaken to revive this neglected old classic English red, white, chrome and blue machine ( on a budget ).

as usual .. sad but free !

The components as acquired were :

Raleigh 3-arm cottered steel crankset 40 / 49 T rings.

it weighs a ton.. sigh.

Brampton BB cups ( standard English threading ) & Phillips spindle.

Suntour 14-24T ‘Perfect’ freewheel 5-speed.

Simplex Prestige rear derailleur  ( plastic / steel ) with bolt-on hanger.

Non original Shimano tourney front derailleur.

Generic steel seat post 26.4mm.

GB Neta alloy stem.

frozen stem … damn !

Alloy drop bars unmarked  36cm wide

Brooks (?) saddle ( missing )

Sturmey-Archer high flange nutted hubs, steel body with alloy flanges 36H. – O.L.D. as measured, front = 96mm – 5/16” axle , rear = 122mm – 3/8” axle.

oh no .. more rust ( but none on the spokes ? ).

Carlton “C” decorative insert in wheel nuts.

Weinmann 730 callipers, Weinmann levers with Carlton hoods.

only one shorty mud guard ..
hmmm..

27” steel rims – MKS quill pedals ( non-original ) – Unbranded head set.

Dimensions – 55cm seat tube – 57cm top tube centre-centre.

There are a lot of steel bits, making the complete bike heavy, but when stripped down, the frame is a reasonable weight. I have a feeling it will ride comfortably as it seems well designed, though the medium weight tubing is not exotic. ( Possibly Tru-wel  high tensile steel ). 

Luckily the fork thread and BB cup threads are standard 24tpi ( not Raleigh 26tpi ) threading, which makes it easier to change these parts if needed. Carlton was taken over by Raleigh around 1960. 

The fork and head tube plus head lugs are chrome plated, and this continues along some of the adjacent tubing. 

The first thing I check on with such a rusty bike is whether or not the seat post or stem is seized, and sure enough, the alloy GB stem was really stuck. You hear all sorts of methods for this ( caustic soda, diesel, heat and so on ) and you may be lucky, ( or you may just make a hopeless mess ). 

My preferred way is to cut the stem off and use a step drill of about 20mm total width. It needs to have a hex shank to fit an extension rod to be used so the drill can go right down into  the steerer. I find that the step drill bit tends to centre itself, avoiding damage to the steerer.

some useful tools and a dead stem..

At some point the heat and pressure of the bit should loosen the remaining stem and release it.

Believe me, I tried to get this one out without damaging the stem, as I like the GB components, but there was no way it would release.

It’s best to avoid normal drill bits or wedges, as it’s so easy to bulge or cut the steerer. I also used a hacksaw to make some internal cuts in the stem to weaken it for the drill. It pays to put an old top cap on the fork threads for protection, while working away.

This job took quite a bit of time and much cursing.

To be continued…

A 1962 Speedwell Special Sports :

I didn’t really have to do much on this one, as it had already been well looked after and was in very roadworthy shape. Nevertheless, I’ve changed the bars from a riser type to the swept back version, which I find more comfortable. Not so much because they give a more upright riding position, more that they are more like drop bars with their parallel wrist and hand positioning.  

The curve in some of these handle bars does make the brake lever fitting more difficult, as there isn’t enough room forward of the grips for the clamps to be on a straight section of bar. They are more suited to coaster brakes in that respect, but will work here anyway.

For the time being, I’ve put on a re-built set of wheels with aluminium rims ( 27” ). They are 36/40H in place of the 32/40H steel ones that would be standard. Meanwhile, I will give the old hub an overhaul.

Some time in the early 60s, the Special Sports decals were changed from the longer lasting down tube paint stencils to a more vulnerable decal. Thankfully this green example has some of the best of this type of decal I have seen.

The main motif on these is an ‘eagle’ design, the old Australian and UK flags on the front forks have disappeared, replaced with a stylised “S” design. ( The black eagle’s head on front end of the down tube and top tube decal is small, and hard to see from a distance ). This bike is number V93029, so the eagle motif pre-dated the change to a ‘W’ prefix serial number.

These decals were changed again somewhat later toward the mid 60s, with a complex ‘boomerang’ style motif.

The bike has the usual Monitor Ventura brakes, Williams chain set, Phillips Apollo pedals and colour matched mud guards ( or fenders, if you like ). 

Some may consider the Special Sports a heavy ‘school boy’s’ bike, but remember that this type of sturdy and reliable bike developed from an era where basic transport cycling was at least as important as the leisure cycling of today, roads were generally rougher, and not everyone owned a motor car. Although fairly heavy, that was largely due to the all steel components. These bikes are not racers, but they are not made of so-called ‘gas pipe’ either.

They are a pleasure to ride.

Following are some pics of another sports, late 50s, with the older ‘wing’ motif design. I’ve featured this one before, but it now has the correct brakes. The Bell saddle has been put aside for preservation while this bike is being used for riding, but otherwise it is visually close to an original, except that the ‘flag’ decals below the fork crown have worn away. This model’s classic decal design is my personal favourite of the special sports bikes. The design before this one ( mid 50s) has a more angular down tube “S”, but is otherwise similar.

above is the older mid 50s down tube script, on ‘wing’ stencil.
early 60s fork decal (L), mid 60s “boomerang” (R)
the blue bike late 50s ( worn BP decal is not original ! ) (L), mid 50s chromed and painted fork (R) – note that the steering head bearing cups have also changed from semi-fixed seats (R) to removable cups (L)

Happy Re-Cycling !